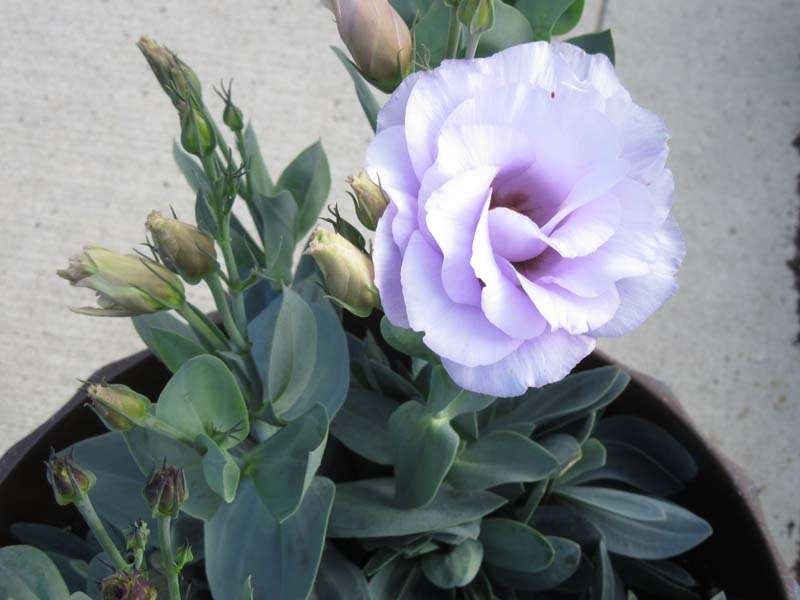
First off, I would like to say that I am no expert at growing Lisianthus, but I am learning more every year and have finally after 5 years had some success.
Hands down my favorite flowers to grow, are also the most challenging. I grow Lisianthus, both from seed, and I also buy plugs (just as a backup)
I used to start the seeds in Dec., but am now starting them mid January. There are not a ton of resources for seeds, but you might try Johnny's Seeds,
but my new favorite place to buy them is Trailing Petunia. They have a huge variety of Lisianthus seeds. Their documentation is not that great, but they
are a great value.
I usually order my Lisianthus seeds in mid to late October. I usually enter all the varieties I purchased in a spreadsheet so I know from year to year what
I have grown. Then when January rolls around I am ready to start planting. I start all of the seeds in 3/4 inch soilblocks with the soilblocker from Johhny's Seeds.
(See picture below). I also use lunch trays to hold the soilblocks. I got them at Amazon. Using soilblocks to plant in means no plastic trays. I always had trouble
using the plastic because it is hard to tell if they are too wet or not. There are plenty of other reasons to soilblock. If you want to learn more about it, please
watch this video. It does a great job of explaining about the why's of soilblocking. I give them a dusting of cinnamon to keep down the algae growth.
The biggest lesson Ilearned this year is to watch the temperature. Everything I read said to use heat mats and cover with a humidity dome. I discovered
last year by putting a thermometer that between the lights being only 3 inches away and using heat mats, the temperature was 90 degrees. Not Good!
So I raised my lights to about 10 inches away and took away the heat mats and achieved a temperature of about 75 degrees. Even this is a little warm.
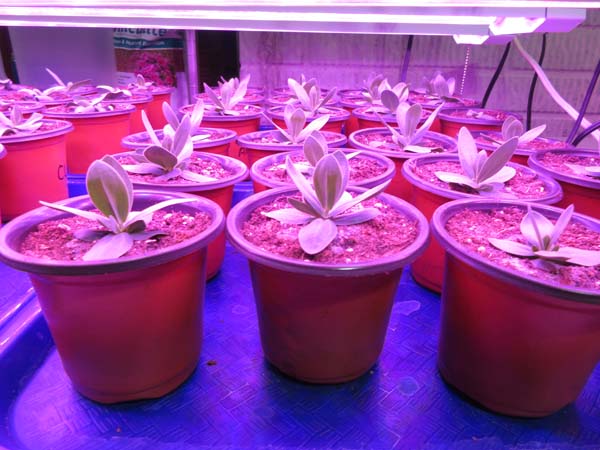
This really made a big differnce. I got about 90% germination. I heep a thermometer on the tables to monitor the temp.
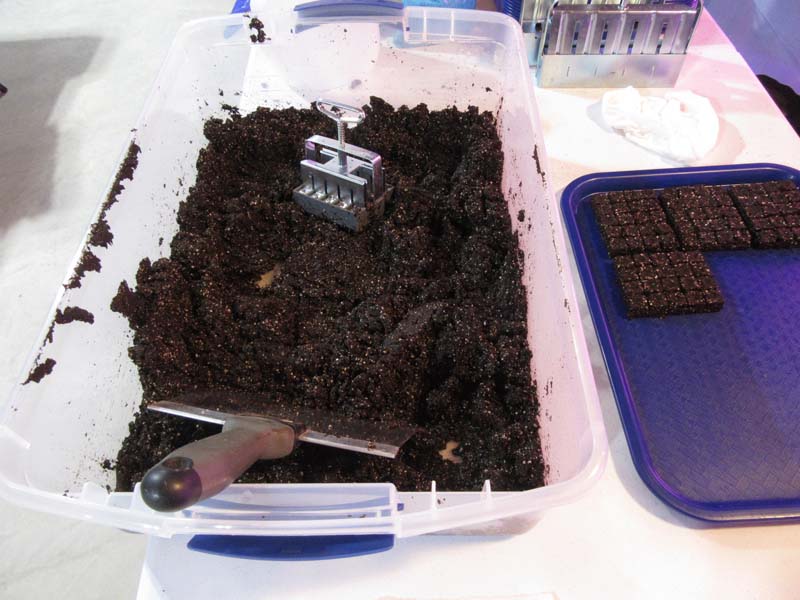
Making Soilblocks. Germinated Lisianthus
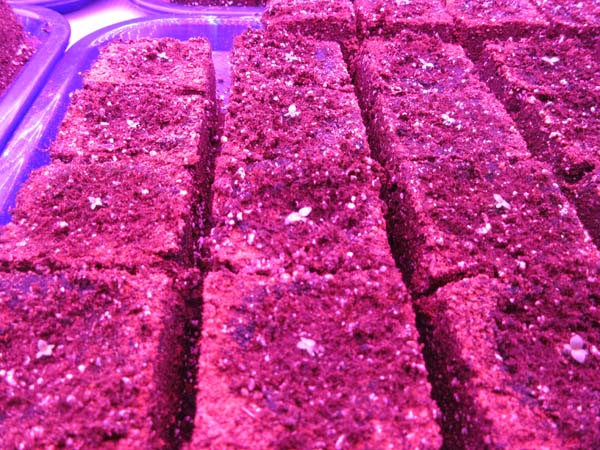
After making soilblocks, which have a small divot for the pelleted seed, I place one see in each soilblock. I bottom water, and put a humidity dome
over the top. It usually takes about 2 to 3 weeks to germinate. I keep an eye on the temperature to keep the flowers from rosetting. Rosetting is the
inhibition of stem elongation, where the plant stays compact and fails to develop proper flower stems. Instead of growing upright, it forms a tight
cluster of leaves—essentially stalling out. Keep the temperature down to avoid this. You can read more about it HERE
 After your seedlings have a few full sets of leaves, it is time to start fertilizing. I have tried fish emulsion,
and others, but I have had the best luck with Bonide Houseplant Liquid Plant Food 10-10-10. I bought it
at Amazon. I used it every watering (about 2 times a week. It is very important to avoid overwatering.
It makes it easy for algae to grow.
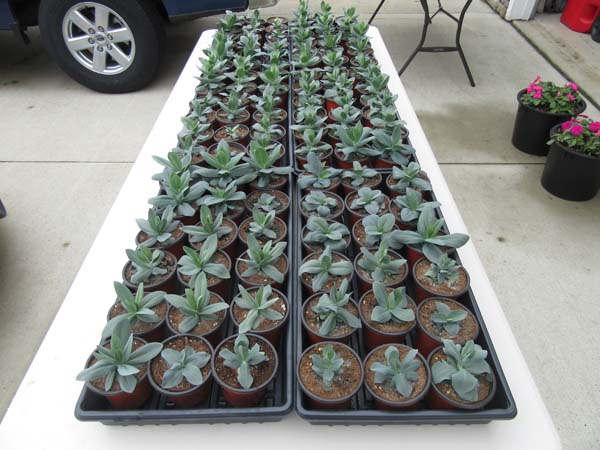
16 pots 3.5 inch dia. per tray Hardening off before planting
After several months, I felt they were getting too big for the 2 inch soil blocks they were in, so I transplanted them into these 3.5 inch post. I got
16 per tray and 72 on each table I had the trays on (6 foor table). In 2026 I am going to try 2.5 inch post as I can get 20 on each tray rather than 16.
Come around May 1st I start taking them outside to harden them off beforeputting them in the ground. To start I take them out on cloudy days
for about 2 hours for a few days, then 4 hours. Then on sunny days a few hours first day and gradually increase the time until they are out a
full sunny day. My wife and I also take them back into the garage every night. Then I am ready to plant once the last frost hits, 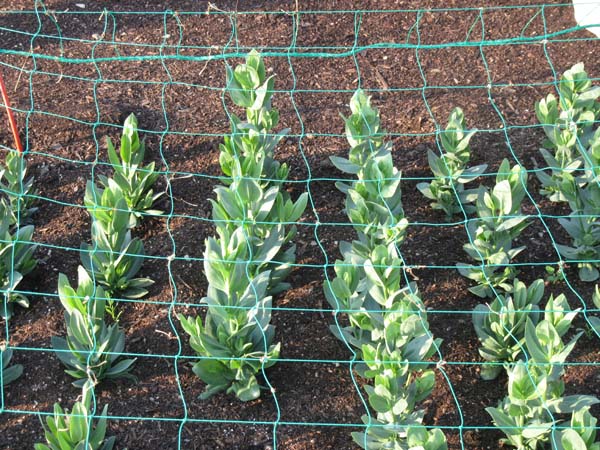
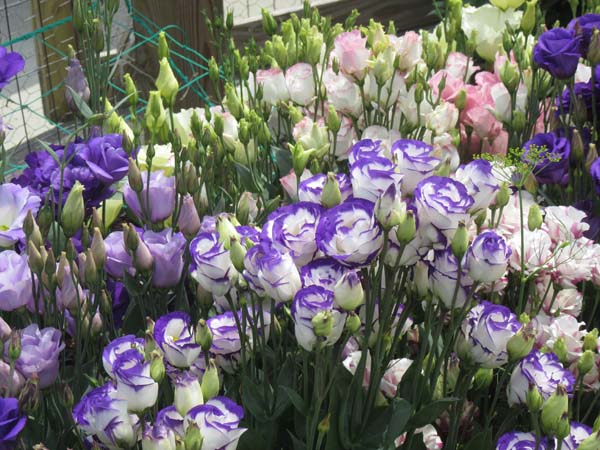
Planting in the ground with nets for support Finally the payoff! It's worth it.
When planting, I dig a hole large enough for the plant to go in, and then I sprinkle a small amount of Osmocote 14-14-14. I use it for both my
vegetables and flowersI then put in fiberglass stakes to fasten the nets to using twisty ties. In past years I got beautiful flowers, but they fall
over.Well worth the time to use the nets for support Now as I said at the beginning of this article, I am no expert, but am just sharing
what works for me. Hope this helps.

This is the Osmocote I use.